
Adding Centro Agentforce Actions for Microsoft Teams to Agents
This guide walks through how to install and configure Centro’s Agentforce actions for Microsoft Teams in your Salesforce org.
Once completed, your Agentforce agents will be able to take actions in Microsoft Teams, such as creating chats or managing channels.
Out of the box actions:
Actions |
Description |
|---|---|
Send Notification to Microsoft Teams Chat |
Given a Record ID, send the conversation text to the appropriate Microsoft Teams Chat based on the Linked Conversation Chat |
Get Linked Conversation |
Gets the linked conversation for any given Salesforce record (input: varRecordId) |
Summarize Teams Conversation |
Given a Record ID, summarize a Teams conversation and return the summary |
Add Members to Teams Chat |
Add Salesforce User to a MS Teams Chats. The user needs to provide the first name or the last name to identify the Teams Member Id. The Microsoft Chat is identify based on the VarRecordid provided by the User. |
Create Teams Chat |
Creates and invites users to a Teams Chat, and links to the Linked Conversation object |
Prerequisites
Before configuring Agentforce actions, ensure the following are in place (also see: Installing Centro Agentforce Components):
1. Install Centro in Microsoft Teams
Install the Centro app in your Microsoft Teams tenant
A Teams admin must authorize the app
Click “Authorize” during setup
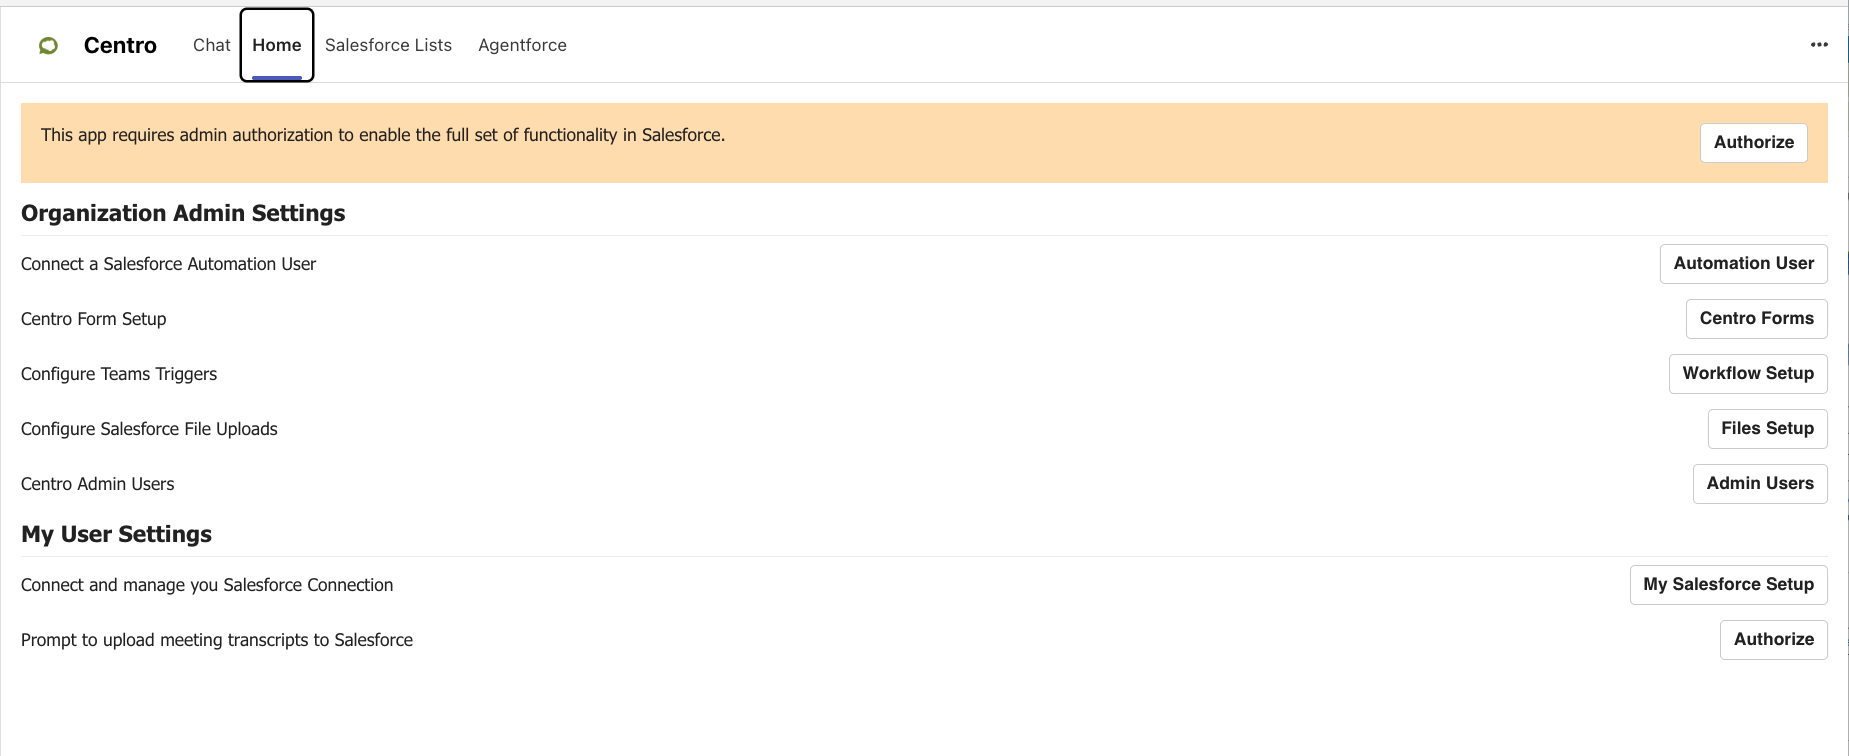
Once authorized:
Active Employee agents will appear in the Agentforce tab within Teams. If you want to view Service Agents, see this article.
2. Install the Centro Core Package in Salesforce
Install the Centro core package in your Salesforce org
This enables the connection between Salesforce and Microsoft Teams
To verify the connection:
Navigate to Centro Setup in Salesforce
Confirm your Microsoft Teams tenant is connected and visible
3. Install the Agentforce Add-On Package
Install the Agentforce for Microsoft Teams package
Add Centro Agentforce Actions
Once prerequisites are complete, you can add Centro actions to your Agentforce agent.
Step 1: Open Agentforce Builder
In Salesforce, go to Setup
Navigate to Agentforce Builder
Step 2: Add Centro Assets
Select your existing agent (or create a new one)
Click Add Asset from Library
Locate Centro Microsoft Teams Integration
Click Finish
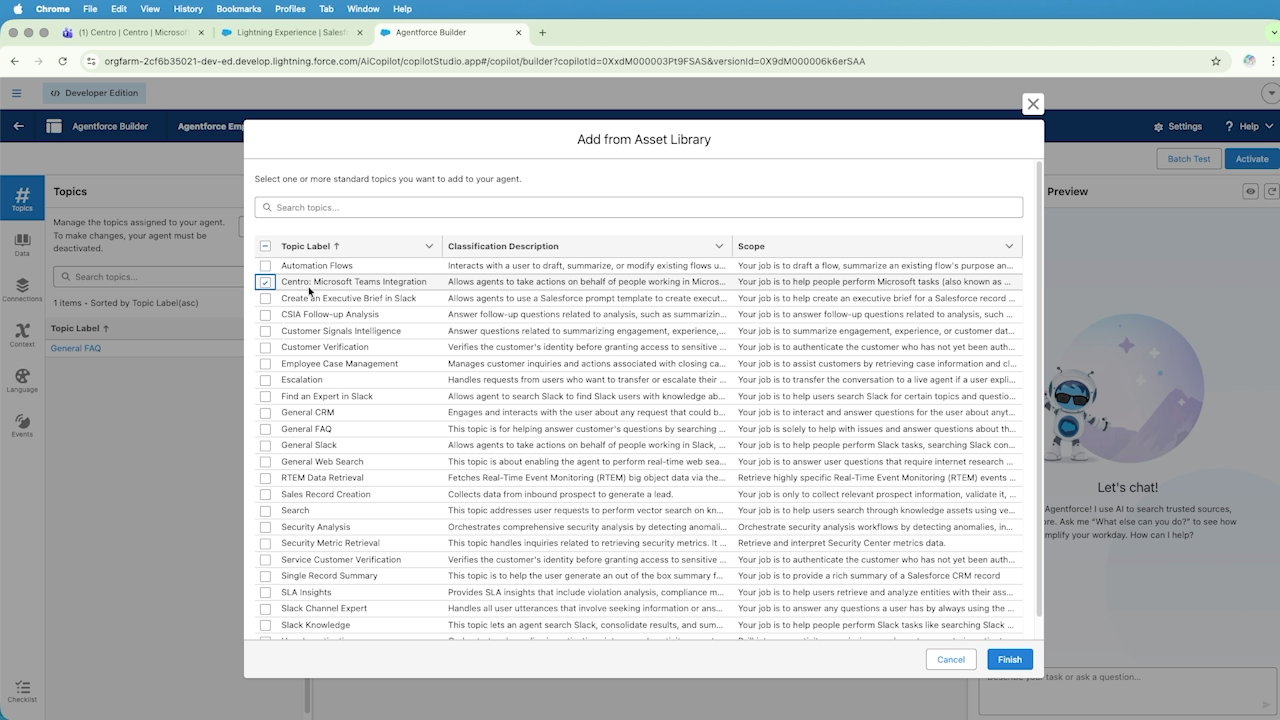
After adding:
A new Topic will appear in your agent
Understand Topics, Actions, and Instructions
Each Centro topic includes:
-
Agent Actions
(e.g., create Teams chats or archive channels)
-
Instructions
These define how and when the agent uses each action
Example
You may see an action like:
Create or archive Microsoft Teams chats and channels
This action is paired with an instruction that enables the behavior.
Customize Behavior
You can control which actions your agent uses:
Remove an instruction to disable a specific action
Keep instructions to allow the agent to execute that functionality
Modify instructions to match user behavior. Note that the instructions that ship with the actions are keying off terms like "MS Teams" instead of "Microsoft Teams", or even simply "Teams".
This gives you the flexibility to tailor how your agent interacts with Microsoft Teams.
Summary
To integrate Agentforce with Microsoft Teams using Centro:
Install and authorize Centro in Teams
Install the Centro core package in Salesforce
Verify the Teams connection in Centro Setup
Add Centro assets in Agentforce Builder
Configure topics, actions, and instructions
Need Help?
If you have questions or run into issues during setup, reach out to theCentro team for support.