Setup Service Agents (External) Create and Configure a Connected App
Create and Configure a Connected App
🔐 Step 1: Set up Configure Connect App in Salesforce
-
In Setup, search for:
External Client Apps
Go to Settings → Enable Creation of Connected Apps
-
Click Create New Connected App and fill in:
App Name: Centro AgentForce for Microsoft Teams
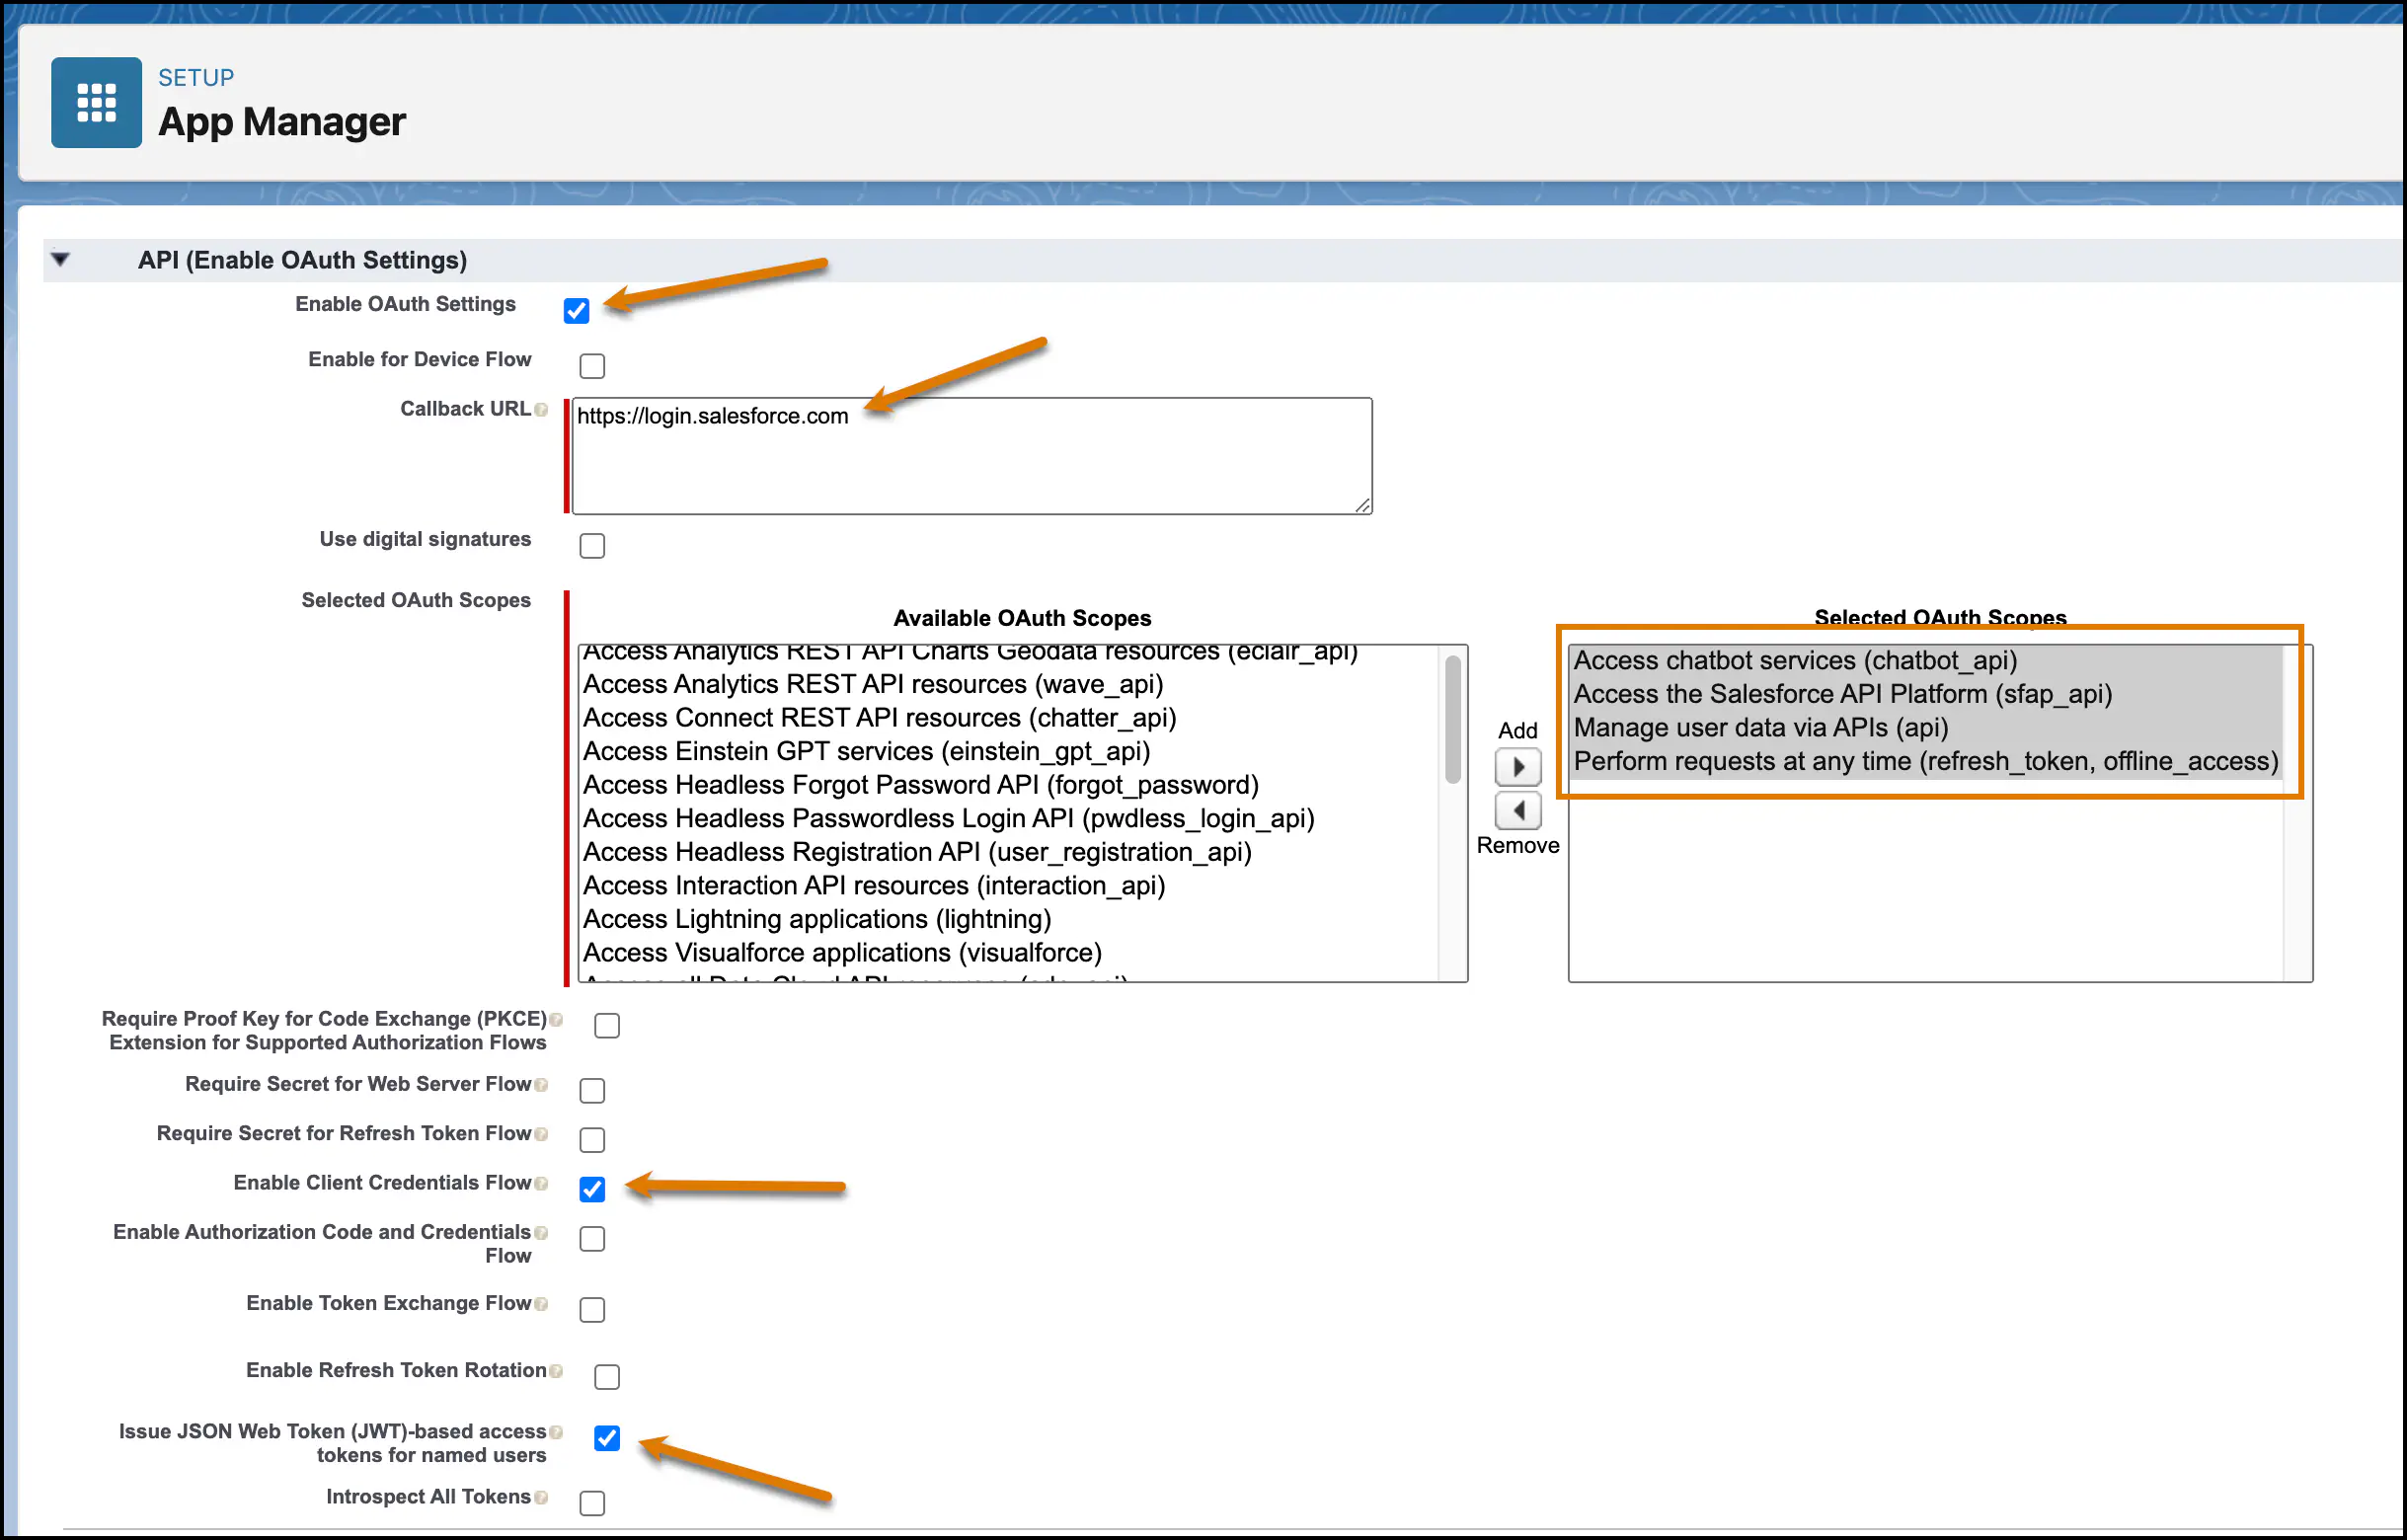
Callback URL: https://login.salesforce.com
-
Selected OAuth Scopes:
(chatbot_api)
(sfap_api)
(api)
(refresh_token, offline_access)
-
OAuth Settings:
Deselect all “require secret” options
Enable client credentials flow
Issue JWT-based access tokens for named users
-
Save and continue.
🔧 Step 2: Finalize Connected App Settings
-
After saving, click Manage → Policies
Set Permitted Users: All users may self-authorize
Under Client Credentials Flow, select a Run As user that has at least API Only access, typically the same user as the Agent User configured on your Agent.
-
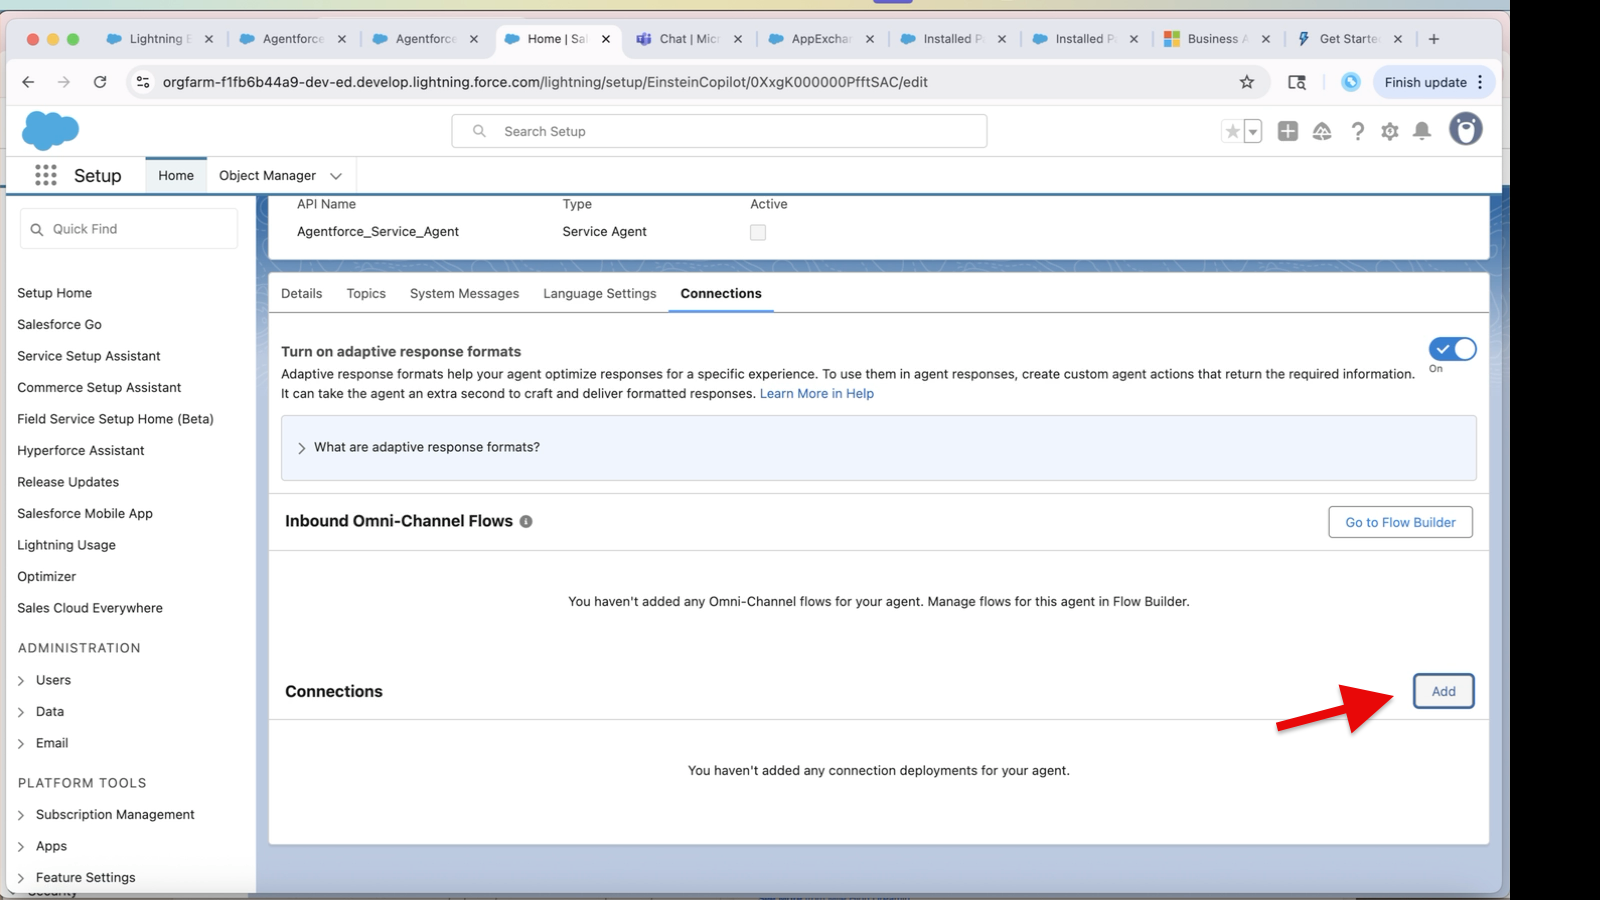
Go to Agentforce → Agents → Select your Agent -> Connections Tab
Click Add in the Connections section detail
Select the connected app you just created
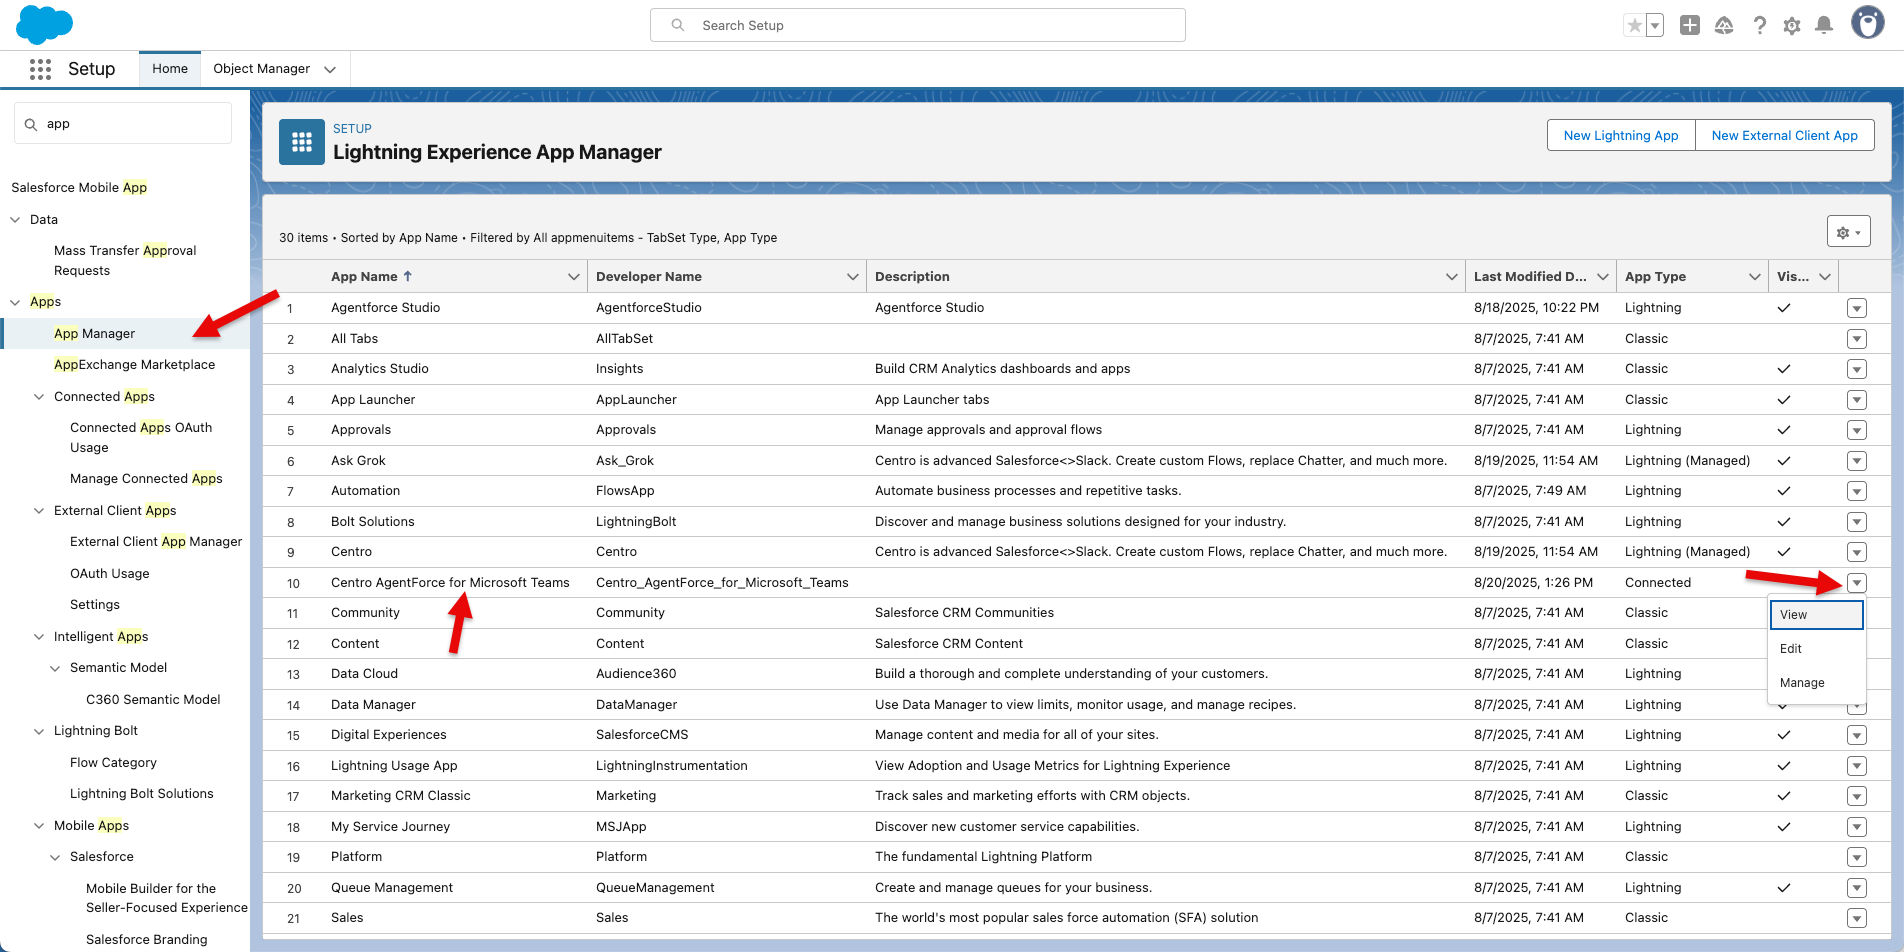
🔑 Step 3: Retrieve Consumer Key & Secret
-
Go to App Manager → Find your new Connected App → View
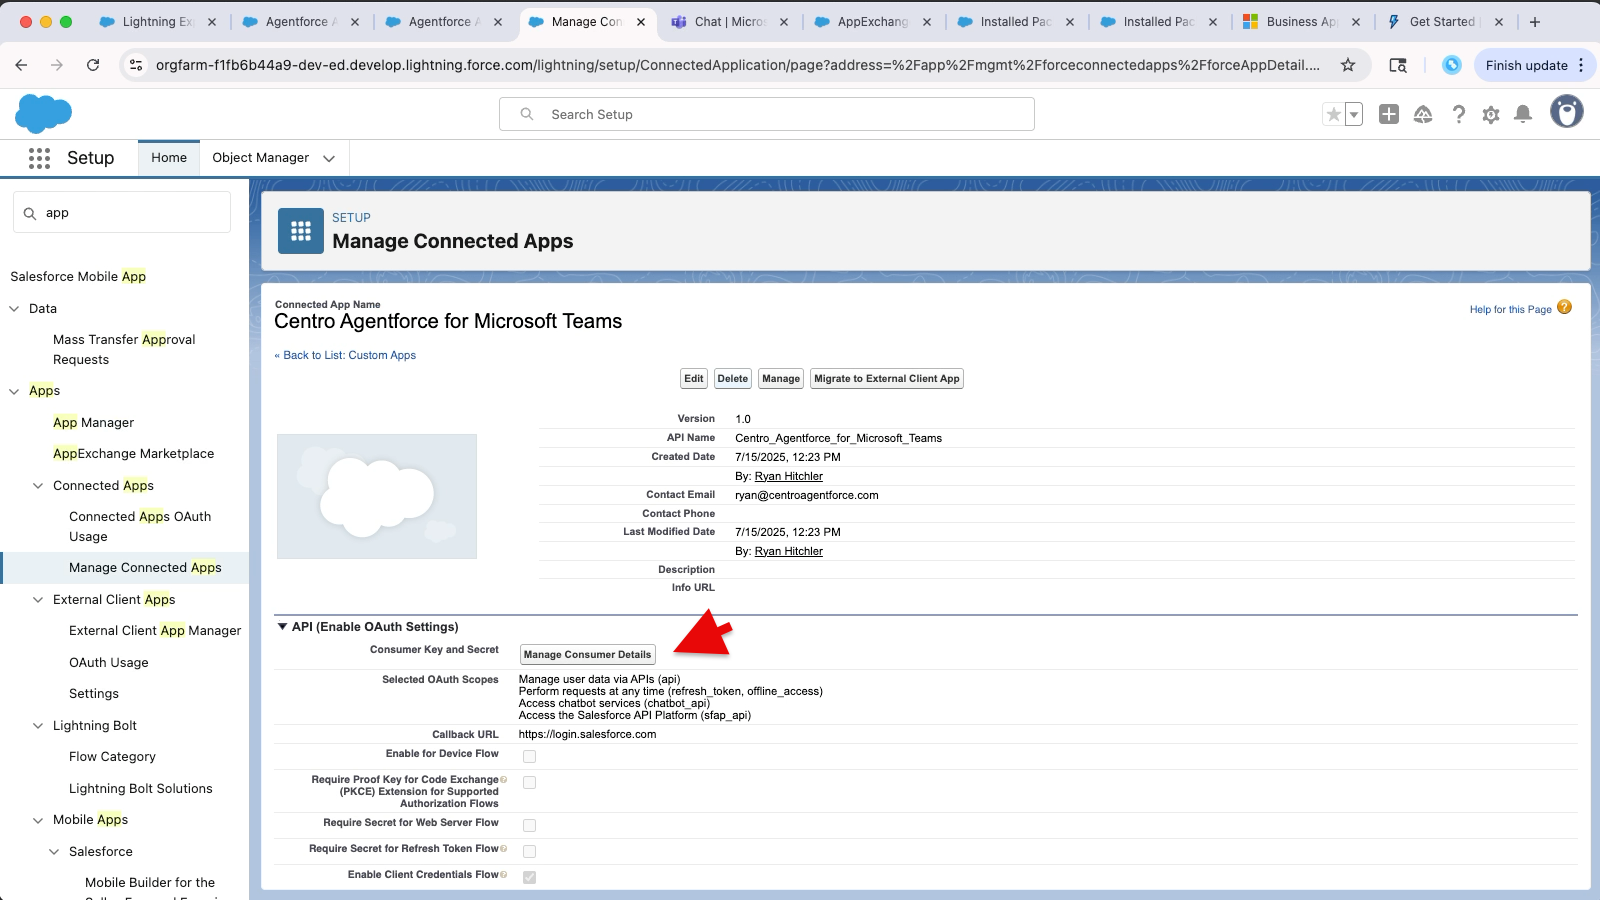
-
Click Manage Consumer Details
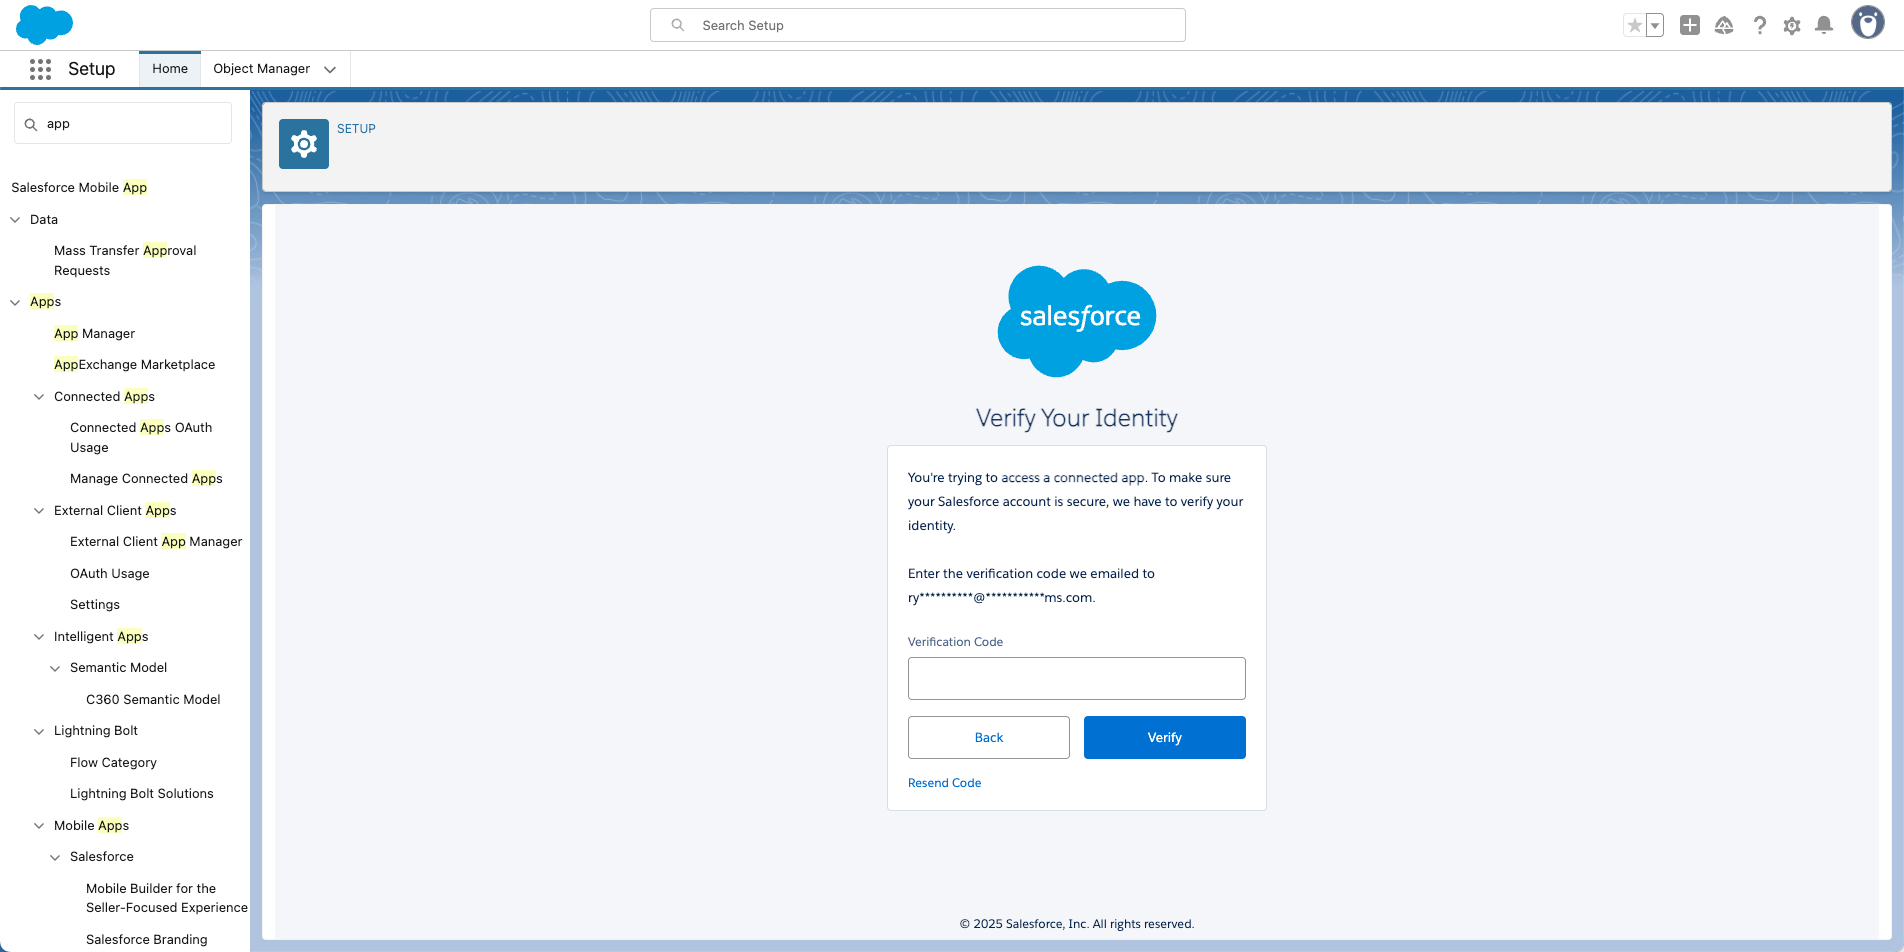
-
Verify your identity via email
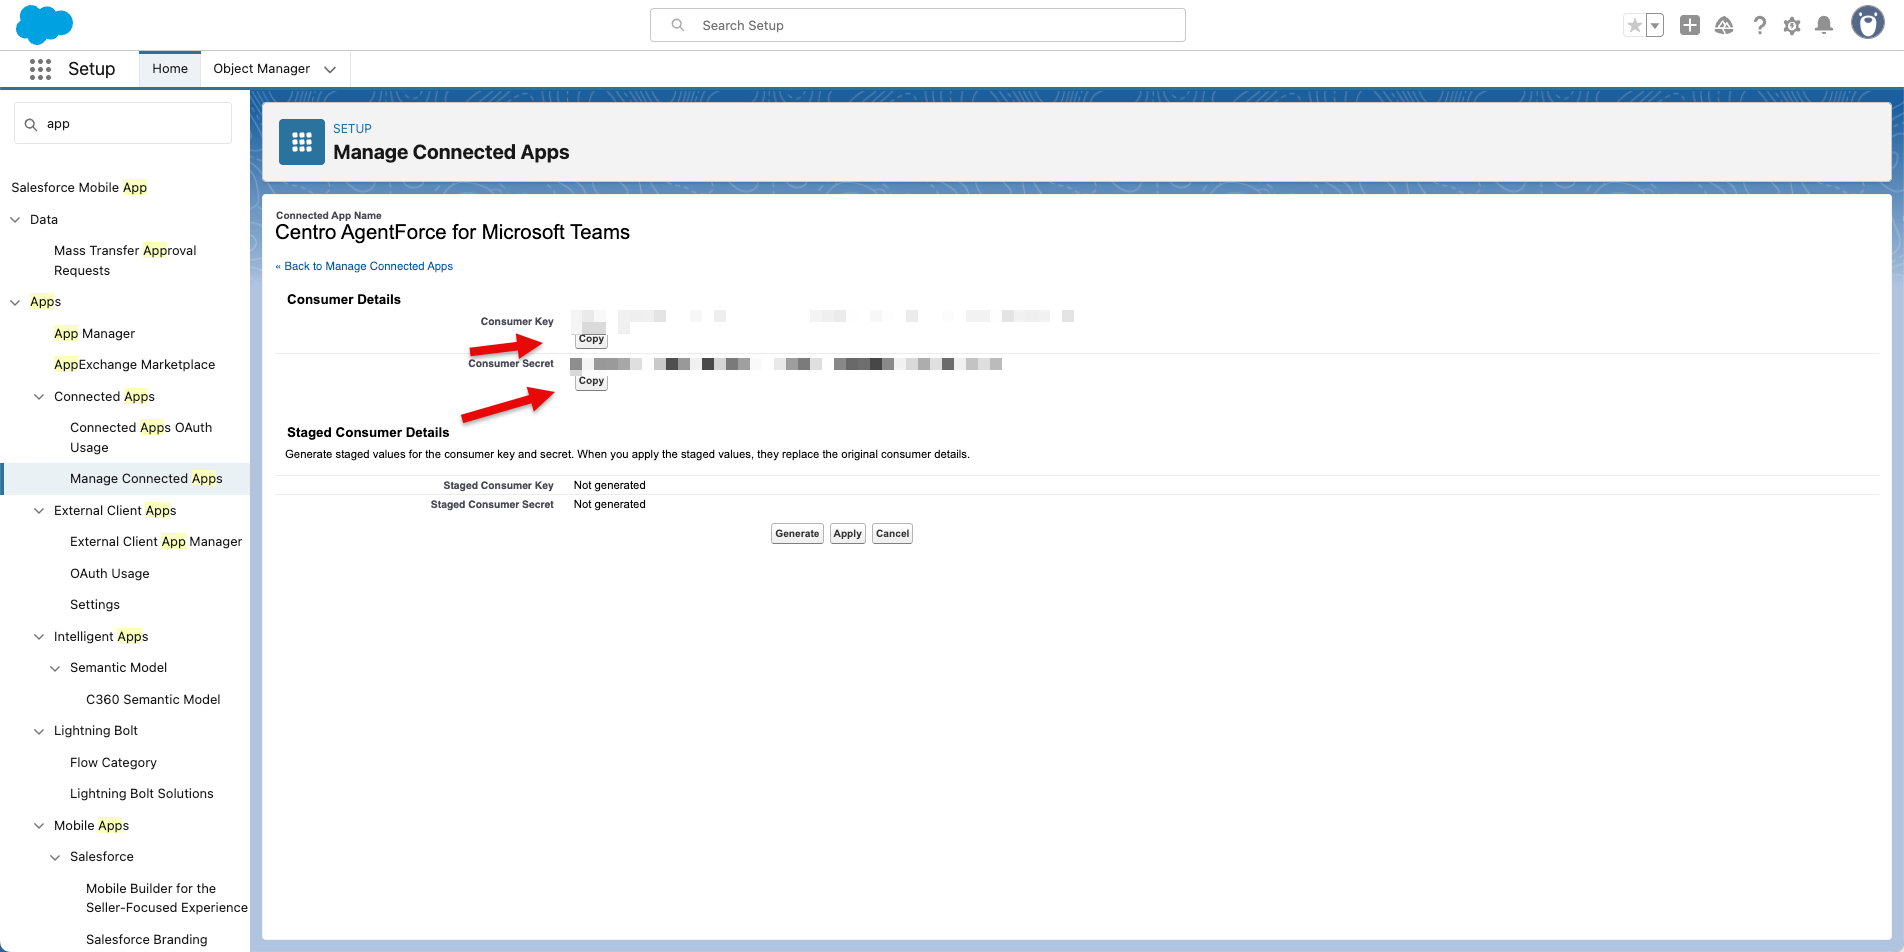
Copy the Consumer Key and Secret
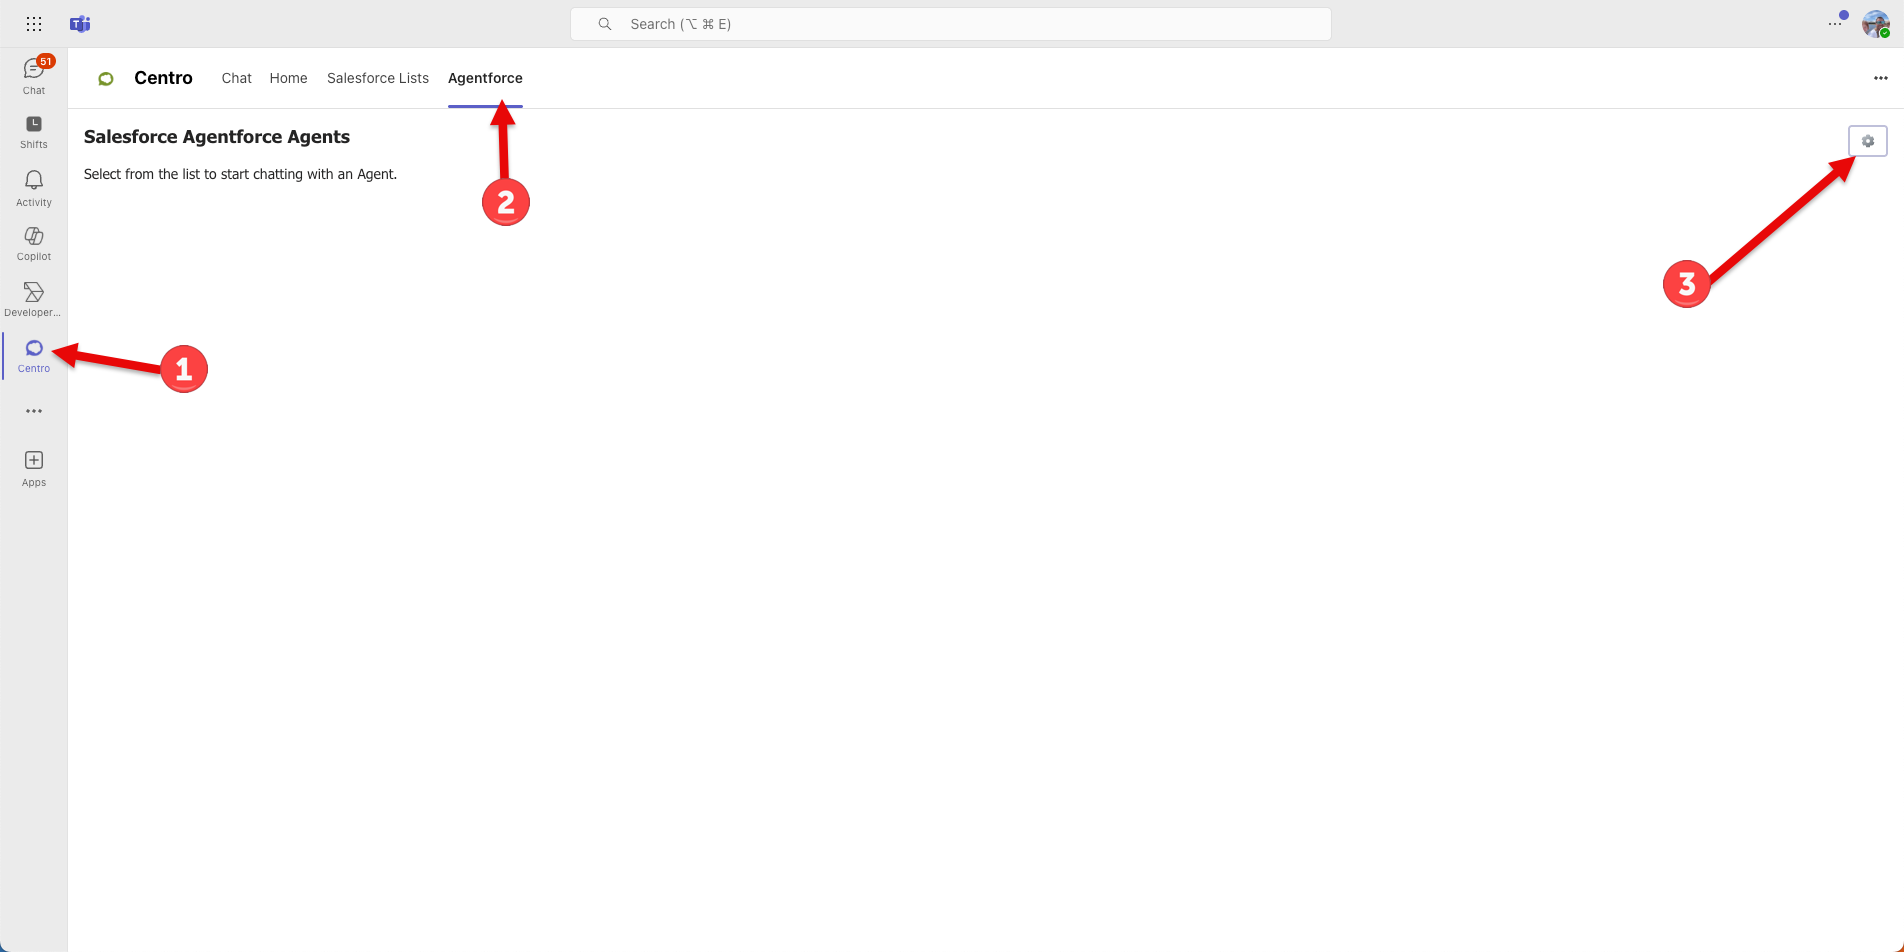
🔗 Step 1: Finish Connection in Teams
In Microsoft Teams → Centro App -> Agentforce Tab
-
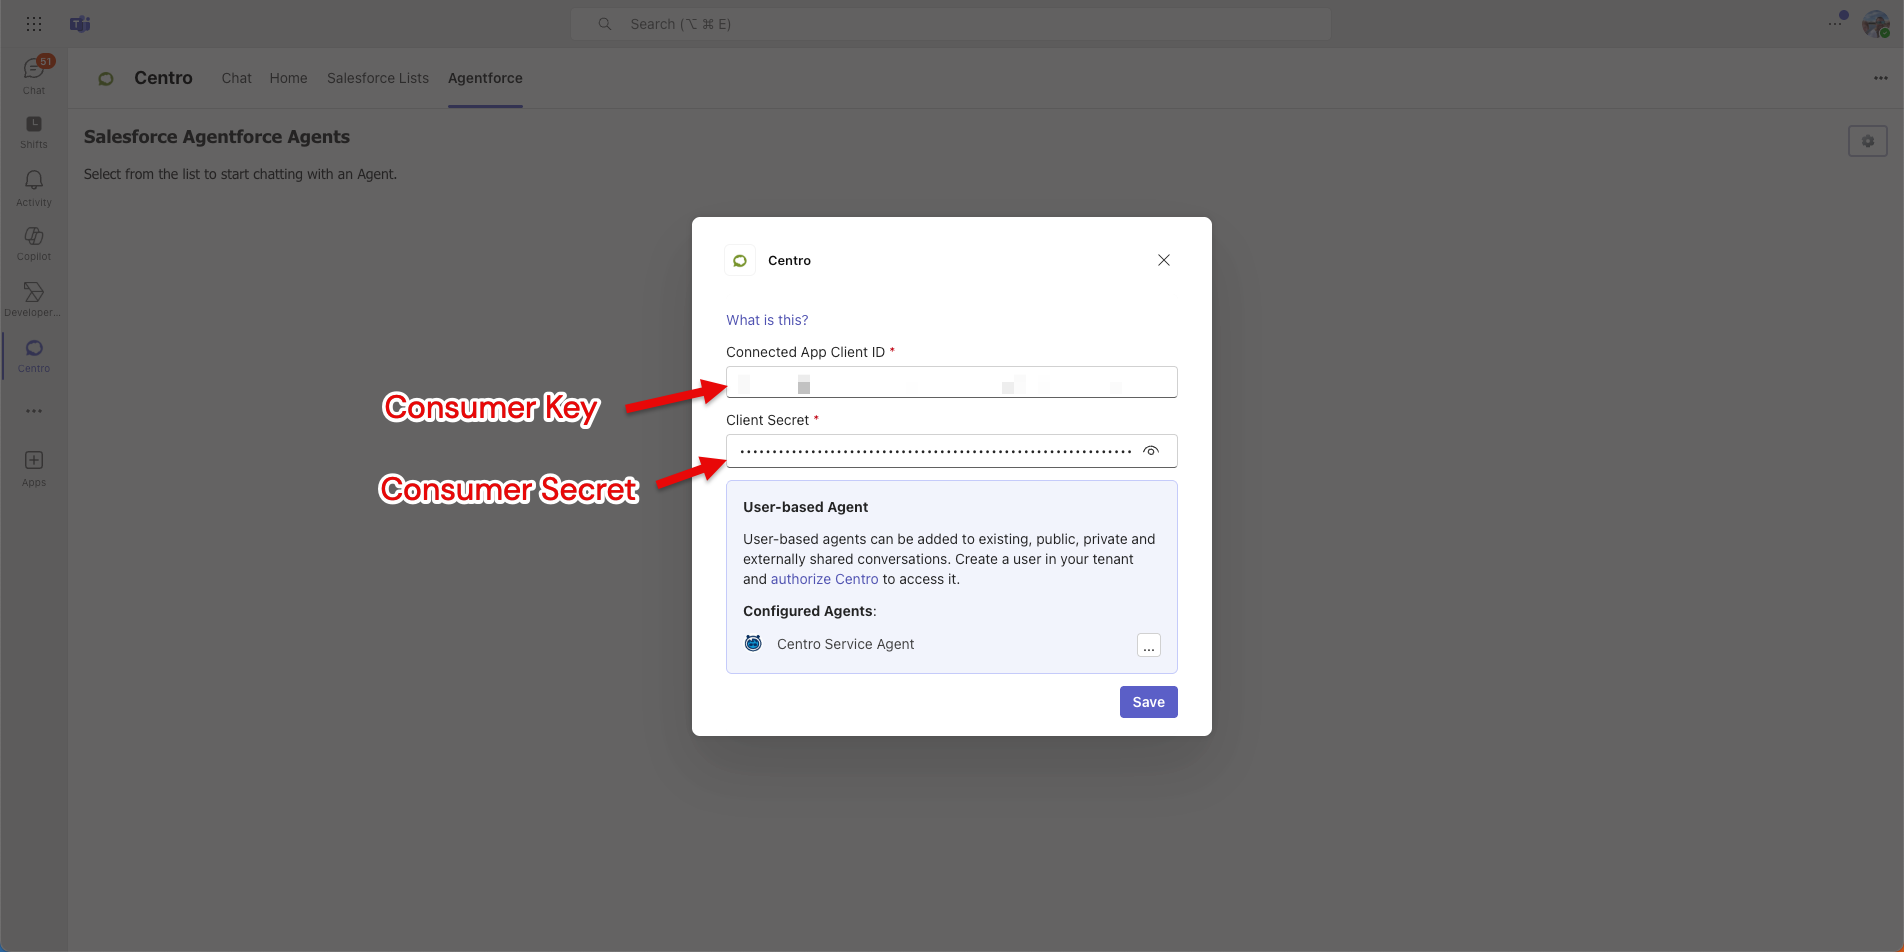
Click the ⚙️ (gear) icon
-
Paste the Consumer Key and Secret from step 10.4 to "Connected App Client ID" and "Client Secret" respectively.
Click Save — the screen should refresh and show your agents
If prompted, connect to Salesforce with your own user which is used to determine the Salesforce Org to list active Agents.
Select an Agent to start a session.